Brake Pad Replacement Checklist
Result
Key Takeaways
- You can replace most front brake pads at home with basic tools and a bit of patience.
- The right jack, jack stands, and a torque wrench are non‑negotiable for safety.
- Always inspect rotors, calipers and brake fluid before finishing the job.
- Ceramic pads are quieter, semi‑metallic last longer, but cost more.
- If any step feels beyond your comfort level, a professional mechanic can save you time and money.
Can you really do it yourself?
Most car owners wonder if they need a garage for a simple brake pad swap. The short answer is yes - you change brake pads yourself in many cases, as long as you follow a solid process and respect the safety rules. The job is mechanical, not electronic, and the parts are designed to be removed and re‑installed without special training.
That said, there are three situations where a DIY approach can backfire:
- When the vehicle uses a complex electronic parking‑brake system.
- If the rotors are warped or severely scored.
- When you lack a stable lift and proper jack‑stand setup.
In those scenarios, calling a professional is the smartest move.
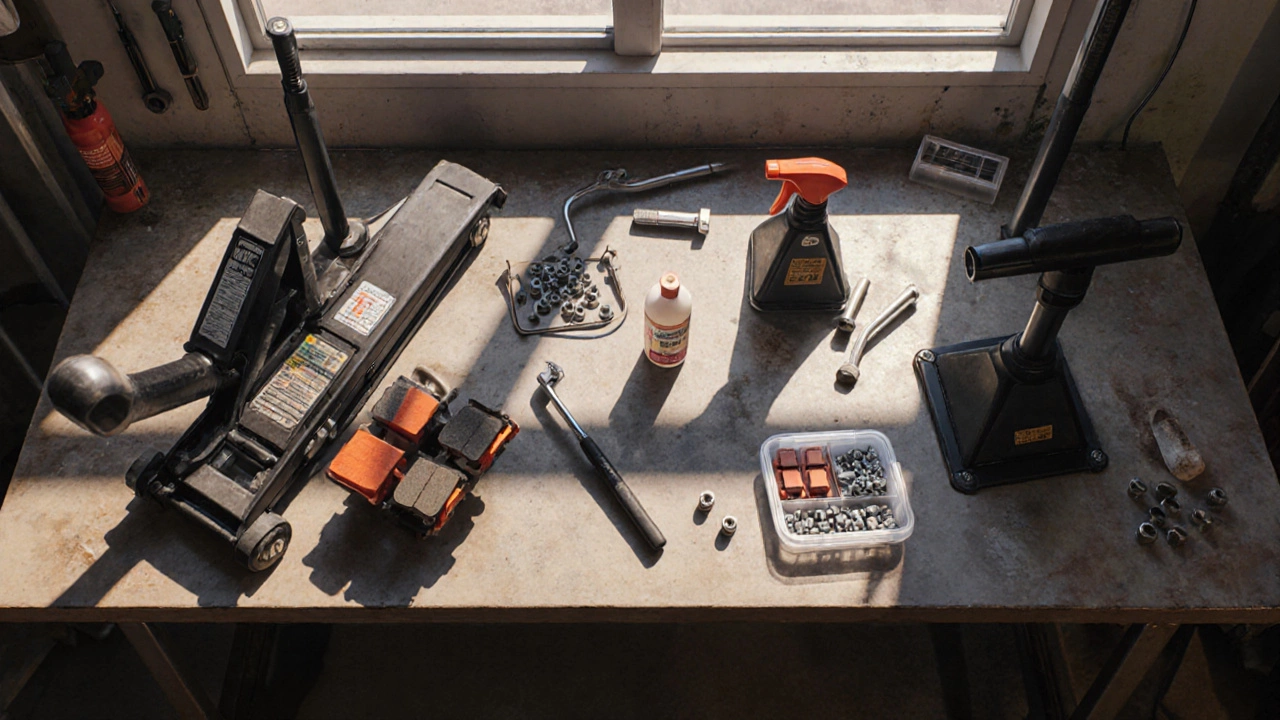
What you’ll need - tools and parts
Gather everything before you lift the car. Missing a single item will force you back to the garage and waste time.
- Jack - a floor jack rated for your vehicle’s curb weight.
- Jack stands - at least two, to hold the car securely.
- Torque wrench - to tighten lug nuts and caliper bolts to spec.
- Lug nut socket (usually 17mm or 19mm depending on the car).
- Brake pad spreader or C‑clamp.
- Brake cleaner spray.
- New brake pads - pick the material that matches your driving style.
- Optional: New hardware kit (clips, shims, anti‑squeal pins).
- Gloves and safety glasses.
Step‑by‑step: Replacing front brake pads
- Secure the vehicle. Park on a flat surface, engage the parking brake, and place wheel chocks behind the rear wheels.
- Lift and support. Position the floor jack under the manufacturer’s lift point, raise the front end, and slide the jack stands under the frame. Lower the car onto the stands - never rely on the jack alone.
- Remove the wheel. Use the lug nut socket to loosen the nuts while the car is still on the ground (prevent the wheel from spinning). Finish loosening once the car is lifted, then pull the wheel off.
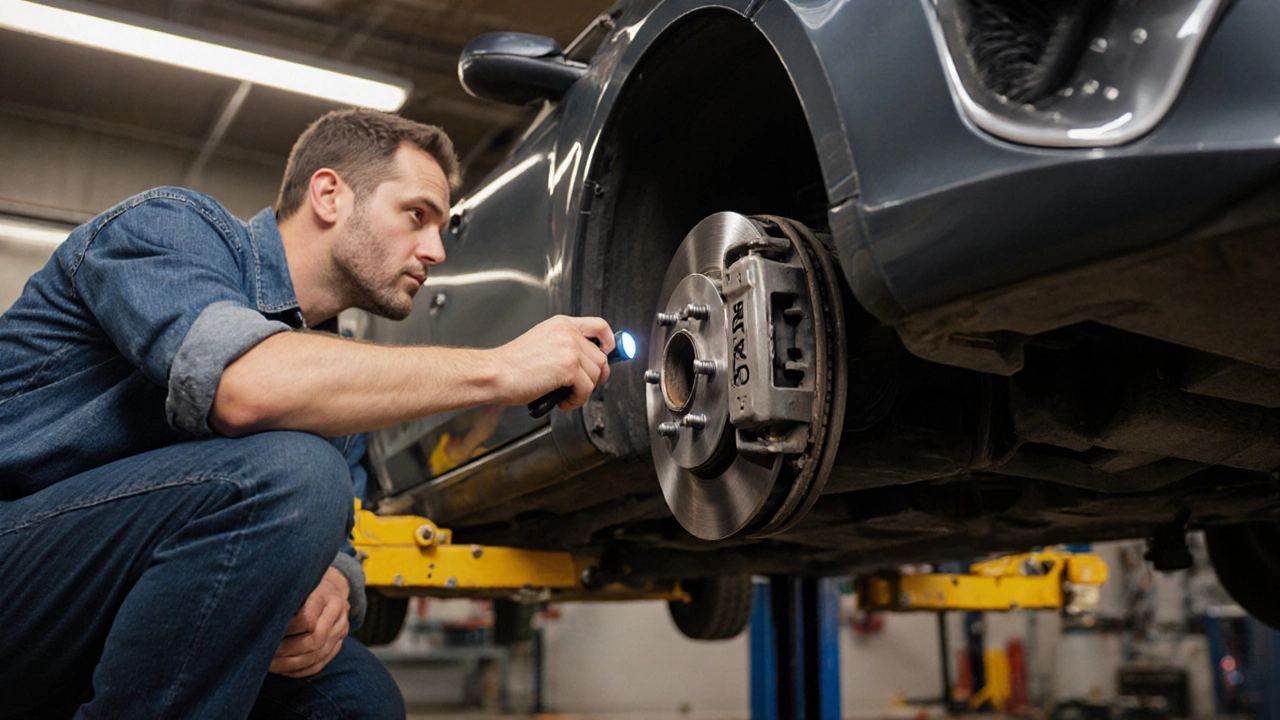
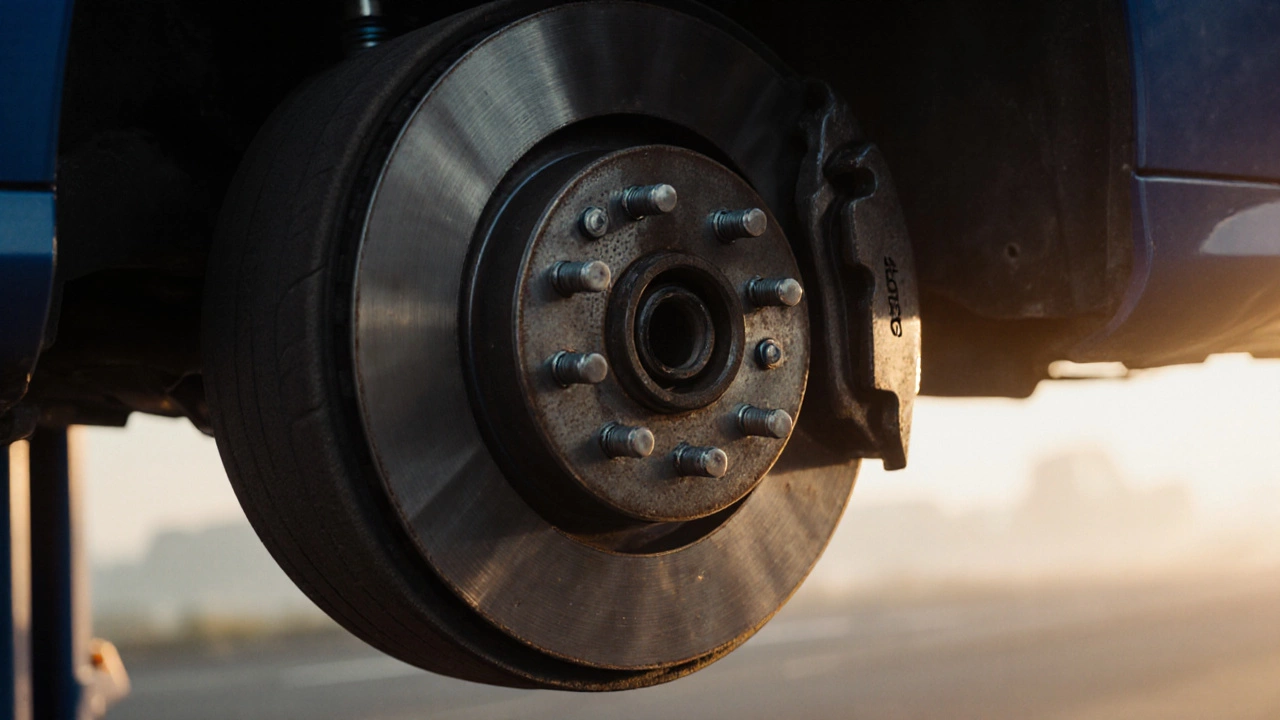
- Access the caliper. Locate the brake caliper. It’s the housing that squeezes the pads against the rotor. Remove the caliper mounting bolts with a wrench; be careful not to let the caliper dangle from the brake hose.
- Extract the old pads. Slide the pads out of their slots. They may be held by clips or pins - note how they’re positioned for re‑assembly.
- Check the rotor. Spin the brake rotor by hand. Look for deep grooves, rust, or wobble. If the surface is uneven, a machining or replacement is advised.
- Compress the piston. Using a C‑clamp or a dedicated piston‑compression tool, gently push the caliper piston back into its bore. This creates space for the new, thicker pads.
- Install new pads and hardware. Place the new pads into the caliper brackets, aligning any clips or shims exactly as the old ones were. If you bought a hardware kit, install the new pins now.
- Re‑mount the caliper. Align the caliper over the rotor and insert the mounting bolts. Torque them to the manufacturer’s specification (usually around 80-120Nm). Use the torque wrench - guesswork can lead to brake pull.
- Re‑fit the wheel. Put the wheel back on, hand‑tighten the lug nuts, lower the car off the stands, then torque the lug nuts in a star pattern to the recommended value.
- Final safety check. Pump the brake pedal a few times until it feels firm; this seats the pads against the rotor. Inspect the brake fluid level in the master cylinder and top up if needed.
- Test drive. Drive slowly at first, testing braking at low speeds. Listen for squeal or grinding - any abnormal noise means something is out of place.
Safety checklist & common pitfalls
- Never work under a car supported only by a jack - always use jack stands.
- Clean the caliper mounting surface; leftover rust can cause uneven brake pressure.
- Do not reuse cracked or severely worn hardware - they can fail under load.
- If the pedal feels spongy after the job, you may have introduced air into the brake lines; a brake bleed might be required.
- Always torque bolts to spec; over‑tightening can strip threads, under‑tightening can let bolts loosen.
Choosing the right pads - a quick comparison
| Material | Noise Level | Longevity | Dust Production | Typical Cost (per set) |
|---|---|---|---|---|
| Ceramic | Low | 7,000-10,000mi | Very low | £120‑£180 |
| Semi‑metallic | Medium | 8,000-12,000mi | Moderate | £90‑£130 |
| Organic (non‑asbestos) | Low‑Medium | 4,000-6,000mi | High | £70‑£110 |
Pick ceramic if you value a quiet cabin and low dust, but don’t expect the longest life. Semi‑metallic pads handle high‑heat situations (e.g., mountain driving) better, while organic pads are budget‑friendly and provide good initial bite.
When it’s smarter to let a pro handle it
If you encounter any of these red flags, pause and call a qualified mechanic:
- ABS sensor wires are damaged during caliper removal.
- Brake fluid has turned dark or contains debris - a full flush is needed.
- The car has an electronic parking brake that requires special tools.
- You feel unsure about compressing the piston or aligning the caliper.
Professional shops have hydraulic presses, brake lathes, and diagnostic tools that can spot hidden problems before they become costly.
Frequently Asked Questions
Do I need to replace brake fluid when I change pads?
No, you don’t have to change the fluid every time you replace pads. Just check the level and look for contamination. If the fluid is dark or has particles, a flush is advisable.
Can I reuse the old brake pads if they’re only mildly worn?
It’s not recommended. Even mild wear leaves uneven surfaces that can cause vibration. New pads guarantee consistent friction and safety.
What torque should I use for the front lug nuts?
Most passenger cars call for 80‑100Nm. Check your owner’s manual for the exact figure and use a calibrated torque wrench.
Do I need a special tool to reset the brake‑pad wear sensor?
Many modern cars require a scan tool to clear the sensor code after replacement. If your dashboard warning stays on, a quick visit to a garage with a diagnostic scanner will reset it.
Is it okay to use the same brake hardware (clips, shims) with new pads?
If the hardware shows signs of rust, cracking, or deformation, replace it. New hardware ensures proper pad positioning and reduces squeal.