Trying to save a chunk of change by replacing your fuel pump yourself? You’re not alone—lots of people eye that fuel system and wonder if it’s as hard as it sounds. The truth? For some, it’s a Saturday project. For others, it’s a headache waiting to happen.
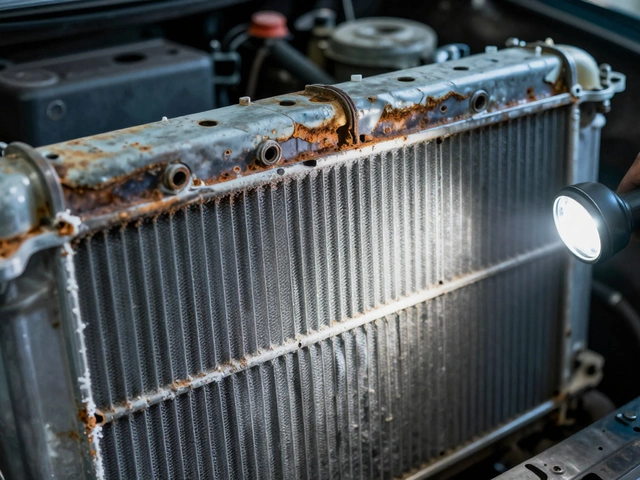
The job isn’t rocket science, but it also isn’t like swapping out windshield wipers. You’ll be dealing with gasoline, squeezed into tricky spaces, sometimes lying under your car with fuel lines staring you in the face. And, believe it or not, the toughest part is often just getting to the pump. In many rides, you have to lower the gas tank—no fun if your bolts are rusted solid.
If you do go DIY, you’ll want to know what you’re really signing up for. This isn’t the job to wing it. Having the right tools, a solid step-by-step plan, and a dose of patience can make or break your day. Mess up, and you could be dealing with leaks, engine stalls, or a car that just refuses to start next time you need to dash to pick up your kids.
- Why the Fuel Pump Matters
- How to Spot a Failing Fuel Pump
- Tools and Prep: What You’ll Need
- Step-by-Step Replacement Guide
- Real-World Tips and Common Mistakes
- Should You DIY or Call a Pro?
Why the Fuel Pump Matters
The fuel pump does one thing, but without it, your car literally isn’t going anywhere. It moves gas from your tank to your engine, sending the right amount at the right pressure, so your car can start and keep running. Cars with fuel injection systems (basically every car since the late 1980s) rely heavily on a working fuel pump.
If your pump fails, the engine doesn’t get gas. That can mean rough idling at first or, sometimes, your engine just dies in traffic—ask anyone who’s had to push their car out of a busy intersection. It doesn’t just stop with stalling though: A faulty pump can leave you stranded, risk engine damage, and seriously mess with your daily plans.
Check this out—fuel pumps are designed to last between 100,000 and 200,000 miles, but some die a lot sooner, especially if you always drive on almost-empty. Why? Fuel in the tank actually cools and lubricates the pump. Less gas means more wear and more heat.
| Model Year | Typical Fuel Pump Lifespan (miles) | Symptoms of Failure |
|---|---|---|
| Pre-1990 | 80,000 - 120,000 | Engine sputter, long cranks |
| 1990–2010 | 120,000 – 180,000 | Hesitation, sputtering, stalling |
| 2010–2025 | 150,000 – 220,000 | No start, weak acceleration, noisy pump sound |
Another tip? Cheaper gas is often dirtier, which clogs fuel filters and puts extra strain on your fuel pump. Swapping the filter when the manual says can buy your pump some extra years. If you ever hear a whine or buzz from under the back seat, it’s usually your pump crying out for help—don’t ignore it.
How to Spot a Failing Fuel Pump
Catching a bad fuel pump early can save you from being stranded on the side of the road (ask me how I know). Here’s what to watch out for if you suspect something’s up with your fuel pump.
- Engine sputters at high speeds: If your car acts up when you’re cruising on the highway but runs fine around town, the fuel pump might not be keeping up with demand.
- Sudden loss of power: Ever press down on the gas pedal only for your car to fall flat on its face? That’s a big red flag.
- No start: When you turn the key and all you get is a crank without the engine firing, the fuel pump may not be delivering fuel at all.
- Strange whining sound from the gas tank: If your car starts to sound like a toy from Freya’s room, that high-pitched whine is usually a warning the pump is giving up.
- Hard starts, even when warm: If you have to crank longer than usual or need to try a couple of times, old fuel pumps often fail before they finally quit for good.
A quick table shows how often these symptoms trip people up:
| Symptom | How Common? | What Usually Happens Next? |
|---|---|---|
| Engine sputters | Very common | Car stalls or struggles at high speed |
| No start | Frequent | Requires tow if missed |
| Power loss under load | Common | Sluggish acceleration |
| Whining noise | Occasional | Pump fails soon after |
One more pro tip: low fuel level light coming on all the time? Running your tank near empty can overheat the pump and speed up failure—something most folks (including yours truly before I read the manual) don’t realize. Don’t run on fumes if you want your pump to last.
Tools and Prep: What You’ll Need
You don’t want to start a fuel pump job only to find out you’re missing something halfway through. Here’s the deal: most of the stuff you need is pretty standard if you’ve dabbled in car fixes before, but a couple items are absolute musts to keep things safe (and keep gas smells off your clothes for a week).
- Socket and wrench set: Most fuel tanks use bolts in awkward spots, usually 10mm, 12mm, or 14mm. Extension bars help a lot.
- Jack and sturdy jack stands: This isn’t the time to trust a cheap jack or a stack of bricks. You’ll be crawling under the car. Go solid and safe.
- Fuel line disconnect tools: Special plastic doodads help pop the fuel lines loose. Some cars need them, some don’t, but they save time (and swearing).
- Drip pan and rags: There will be some gas spill, no matter how careful you are. Get a cheap foil pan and dedicated rags ready before you start.
- Rubber gloves and goggles: Gasoline isn’t something you want on your skin or in your eyes, ever.
- Fire extinguisher: Not just a “maybe.” Keep it within arm’s reach. Gasoline fumes can go up real fast.
- Replacement fuel pump: Double–check the part number. Car models can change pumps between trim levels or production years.
Tip: If your car has an access hatch under the back seat or in the trunk, you might dodge dropping the gas tank altogether. Not all cars do, but it’s worth checking to save a world of headache.
One last thing—work in a well-ventilated spot. Gas fumes in a closed garage are bad news for your health and your house. Crack the garage door or work outside if you can. The prep isn’t thrilling, but it’s the stuff that keeps you (and your car) safe.

Step-by-Step Replacement Guide
Before you start, make sure you’ve got a new fuel pump that fits your exact car, a set of wrenches, screwdrivers, a jack, safety glasses, a container for draining gas, and if possible, a buddy to spot you. Always disconnect your battery—fuel plus sparks don’t mix.
Here’s how to get it done:
- Relieve pressure from the fuel system. There’s usually a fuse or relay in your fuse box for the fuel pump. Pull it, start the car, and let it die. This gets excess fuel pressure out of the lines.
- Next, raise the car securely with a jack and jack stands. Never just rely on a jack. Safety first.
- Drain the gas tank if the pump is inside it. Place a container under the tank, find the drain plug (if your car has one), and slowly open it. No plug? You may need a siphon pump. Less fuel means less weight.
- Disconnect the fuel lines and any electrical connections running to the tank. Some lines use plastic clips—take your time and avoid breaking them. Mark what goes where if you’re worried you’ll forget.
- Loosen and remove the bolts or straps holding the gas tank. Lower it down with help or a transmission jack if you’re working solo. They can weigh 40+ pounds when empty.
- Pop off the ring or screws holding the pump assembly, then carefully pull out the old pump. It’s ok to get a little gas splash—just wipe anything up fast.
- Swap the old fuel pump for your shiny new one. Don’t forget the new strainer or sock filter if your replacement kit came with it.
- Put everything back together: pump assembly, tank, connections, and straps or bolts. Double-check that all lines are secure, tight, and routed correctly.
- Reconnect the battery, and before starting the engine, turn the ignition to “on” for about three seconds a couple of times. This primes the new pump and avoids dry starts.
- Fire up the engine and check for leaks—if it runs smooth and you don’t smell fuel, you nailed it.
Here’s a quick look at what most folks face, depending on car type:
| Car Type | Pump Location | Average DIY Time |
|---|---|---|
| Sedan / Hatchback | Inside gas tank (floor access in some models) | 2-4 hours |
| Pickup/SUV | Inside gas tank (usually tank must be dropped) | 3-6 hours |
| Older models | External, on frame or engine | 1-2 hours |
Don’t rush and keep your hands clean. Remember, a new fuel pump can transform your car from sputtering mess to smooth operator if you follow these steps carefully.
Real-World Tips and Common Mistakes
Replacing a fuel pump isn’t just about turning a few bolts. Tons of folks make rookie errors that turn a simple fix into a nightmare. Here’s what you actually need to know before and during the job.
- Disconnect the battery first. Seriously, don’t skip this. Any spark near gasoline is a disaster waiting to happen.
- Drain the fuel tank, or at least run it super low. Lifting a full tank is a backbreaker and a big safety risk. If your car doesn’t have a tank drain plug (most don’t), use a siphon pump.
- Label and snap photos of every hose and wire. Trust me, they all start to look the same once the tank’s dropped. Your future self will thank you when it’s time to put it back together.
- Replace the fuel filter at the same time. Clogged filters are a top reason for pump failure to begin with, so you might as well swap it while you’re in there.
- Inspect the old pump and connections. If you see melted plastic plugs or corroded wires, fix or replace them. Bad connections ruin new pumps fast.
- Wear gloves and eye protection. Gas in your eyes isn’t fun, and skin contact gets old real quick.
- Torque bolts to the right specs. Overtighten and you’ll crack plastic or strip threads. Underdone, and you could get leaks.
Biggest mistake? Not checking your work before reassembling everything. Power up the pump (just for a second) before bolting the tank back in, so you know everything is wired right and you’re not hunting for leaks later. Also, don’t ignore a rusty tank strap—if it looks sketchy, replace it. One final tip: a second set of hands makes everything easier, especially when hoisting the tank. Even bribe your neighbor with pizza if you have to.
Should You DIY or Call a Pro?
So here’s the question: should you give this fix a shot in your own garage or drop your car at a shop? Honestly, there’s no one-size-fits-all answer. Some folks love crawling around their cars and don’t mind getting a bit gassy. Others just want the keys to work when the morning school run rolls around.
If you’ve got a decent set of tools, some patience, and at least basic car know-how, it might make sense to replace your fuel pump on your own. The real trick is being honest with yourself. Do you have ramps or jack stands? Are you comfortable disconnecting battery cables, fuel lines, and electrical connectors? And most importantly, will you double-check every step—because if a fuel fitting isn’t tight enough, you’re risking a fire. Not worth shaving a few bucks just to stress out or create a bigger problem.
Let’s get practical. Check out this table for a quick breakdown of what to expect with both approaches:
| Aspect | DIY | Professional |
|---|---|---|
| Average Cost (including parts) | $100–$350 | $400–$800+ |
| Time Needed | 2–6 hours | 1–2 hours (drop-off service) |
| Tools Required | Wrenches, socket set, jack stands/ramps, fuel line tool, safety gear | All included |
| Warranty | Usually none, unless you buy a premium part | Parts & labor, often 12 months/12,000 miles or more |
| Mess/Stress Level | Medium to high (expect gasoline fumes and tight spaces) | Low (just paperwork and payment) |
Safety should always be your top priority. If you smell gas for days after the job, something’s off. If you break a line or a fuel pump connector, you could end up paying more than if you just let a mechanic handle it in the first place. Some fuel pumps sit under the rear seat for easy access—sweet deal if you’re lucky. If not, be ready to drop the gas tank, which can get heavy and awkward fast.
One final tip: If your car is still under warranty or part of a recall, have the shop do it. You could get a free fix, or at least avoid voiding any coverage. Search your VIN for recalls before you grab your tools. And if you do go DIY, never skip watching a video for your exact car model first—trust me, the devil’s in the details.